Scratching your kayak while kayaking is inevitable. Whether you paddle through whitewater or shallow waters doesn’t matter, as kayaking brings your kayak in contact with sharp rocks and pebbles. Therefore, knowing how to maintain your kayak and repair kayak scratches is important.
Know Your Kayak

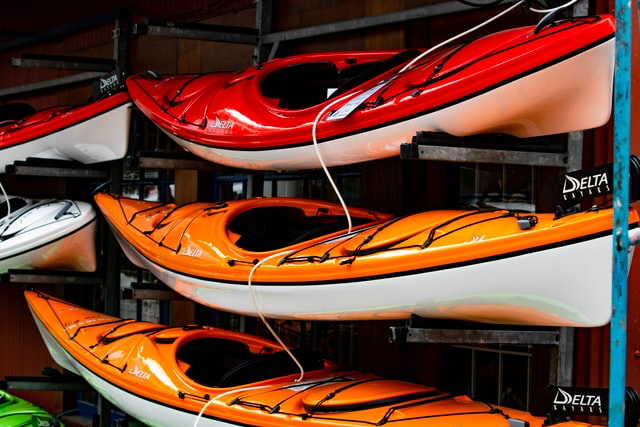
The first step to fixing a kayak scratch is knowing the material used in construction. Modern kayaks are made from different kinds of material. These materials determine not only your kayaking costs but also the repair. Knowing your kayak material will help you pick the best way to fix scratches.
Here are the different types of kayaks based on their materials:
- Wooden Kayaks
- Rotomold kayaks
- Inflatable/Folding Kayaks
- Thermoform Kayaks
- Plastic kayaks
Fixing Scratches on Wooden Kayak

If you constructed your wooden kayak, it would be easier to fix scratches. This is because the materials you need are not so different from those used in construction.
The first step to fixing a wooden kayak is considering the extent of the damage. It can be left alone if the scratch is minor and doesn’t expose the bare wood. Minor scratches on the kayak are indicative of use.
If the scratch is deep and can consequently cause damage to the kayak, then you need to follow these steps:
1: Dry out the damaged area. You can do this by leaving it out to dry, applying heat to it or applying denatured alcohol to evaporate the water.
2: Take off the paint or varnishing. You can do this using 120-grit sandpaper to expose the fiberglass around the damaged area.
3: If the scratch is small enough, apply unthickened epoxy to fill the cracks.
4: Sand smooth with a 220-grit and then repaint or re-varnish.
Note: If the scratch is deeper, fill with a thickened epoxy and then epoxy a small patch of fiberglass over the scratch. You can then sand smooth or feather the area.
Fixing Scratches on Rotomold Kayak
Though known for their tough exterior and ability to bounce off rocks, rotomolded kayaks often get scratches. These scratches can be minor or deep, depending on use. Once you notice these scruffs on your kayak, it is time for a shave.
To repair scratches on Rotomold kayaks, you need a good razor to shave the kayak. You can use your cheap disposable razor to slice off the surface for small spurs protruding from the kayak. This will help keep the damaged area smooth.
If the damage is exaggerated, you can use a surform to scrap away the roughage on the kayak. Doing this reduces the mismatched network of scratches, leaving uniform scratches. This is easier to kayak with as it minimizes the drag on the damaged area.
Your kayak is good when these spurs or protruding spikes are shaved off. However, deeper holes require more extensive repair. To fix holes, you can follow these steps:
1: Smooth out and simplify the kayak edges.
2: Get a color patch or material and cut it to the size of the hole.
3: Add wooden support to the underside of the hole edge.
4: Glue or weld the color patch or material into place.
Note that: Fixing holes on rotomolded kayaks may require professional expertise to get the best result.
Fixing Scratches on Inflatable/Folding Kayak

Inflatable kayaks are known for their versatility and being roomy. However, these kayaks are more susceptible to punctures, especially when kayaking through rapids. How you Fix an inflatable kayak depends on the severity of the damage.
The first step to repairing an inflatable kayak is to find the leak. There are several methods you can use to locate the leak in your inflatable kayak, such as:
Method 1: Listen for the leak
To do this, you need to inflate your kayak and place your ear along its surfaces while you listen for any hissing sound. If you can hear it but can’t find the hole, check the seams and apply pressure. Adding pressure allows air to escape faster, producing louder hissing sounds.
Method 2: Place your kayak in the water
For this method, you need clear water. Inflate your kayak and place it on the water. Dive underneath your kayak and watch out for air bubbles. This method works best if you have holes at the base of the kayak. As air escapes, it releases air bubbles into the water.
Method 3: Use soapy water

Another trick to locating a leak is using soapy water. Apply soapy water to your inflated kayak and inspect for bubbles. You can apply it all over the kayak or to the suspected area. Once you’ve put the solution over the kayak, listen for soap bubbles. When air escapes underneath the water, the soap in the water causes bubbles to form.
After locating the leak, you can now repair your kayak. To repair a small leak or puncture, follow these steps:
1: Deflate the boat and clean and dry the area that needs repair.
2: Apply small drops of glue and let it dry for about 12 hours.
You might need to attach a patch to the leaking area for more serious damage. To do this, follow these steps:
1: Get a patch material that is compatible with your kayak.
2: Get an adhesive that works with the patch material.
3: Lightly sand the damaged area of the kayak and the patch.
4: Apply glue or adhesive all over the damaged area of the kayak and the patch.
5: Place the patch on the hole and use a plastic scraper to apply pressure on the patch.
6: Allow the patch to sit for 24 hours.
Note: You might also need an interior patch if you have a larger hole.
Fixing Scratches on Thermoform Kayak
Thermoformed kayaks are generally stronger than rotomolded kayaks. They are tougher and offer better abrasion resistance. As a result, it is hard to find scratches or cracks in thermoform kayaks.
However, when you find scratches, they are very easy to fix. To repair scratches or cracks on your thermoform kayak, follow these steps:
1: Clean the damaged areas with isopropyl or rubbing alcohol.
2: Mask the repair area, and on one side of the fiberglass tape, apply Devcon Plastic Welder.
3: Use a tool to spread evenly across the cloth.
4: Pick up the fiberglass strip and apply the wet side down to the inside of the damaged surface.
5: After a short while, add the Devcon Plastic Welder evenly to the “dryer side” of the fiberglass strip.
6: Cover the first patch with a second patch using the same process.
7: Create a groove around the damage and fill it with pigmented Devcon Plastic Welder.
8: Wet sand the repair until it is smooth and then polish.
Note that: For minor blemishes, you can sand with wet sandpaper and then fill with plastic polish.
Fixing Scratches on Plastic Kayaks
Plastic kayaks are constructed using high-density polyethylene (HDPE). This material makes it extremely flexible and durable. However, it is more difficult to repair as it prevents other materials from bonding to it.
Scratches are typical for plastic kayak experiences. You can use a razor to cut off the rough edges to fix minor scratches. Where the scratches are deep, follow these steps to fix your plastic kayak:
1: Get a plastic patch from the kayak or purchase HDPE weld rods.
2: Use a lighter or heat the plastic until it melts.
3: Allow the dripping plastic to fill the scratch.
4: Use a spoon or screwdriver to smear it on the groove.
5: Sand and trim the excess to make it look smooth.
Note: If there is serious damage to the kayak, you will need to consult a professional. Poor repairs can further damage the kayak.
How to Avoid Scratches in Your Kayak
While you cannot entirely prevent occasional scratches, It is essential to know how to avoid these damages. The following are evasive tips you can adapt to prevent kayak damage.
- Be cautious when loading, hauling, docking or transporting your kayak on rocky shores and sandy beaches.
- Store in an appropriate place. Avoid exposure to heat or weather damage.
- Take extra care when kayaking down rapids or places with stumps.
Summary
While there is no surefire way to prevent scratches, it is crucial that you inspect your kayak for scratches after an expedition on the water. Catching it early prevents the damage from irreparable devolution. When you do find the damage, use the steps above to care for and maintain your kayak.